 Flipswap
Setup
Flipswap
Setup Flipswap
Setup
Locations
1. Go to Master Files - Locations
2. Right click a retail location and select New Bin.
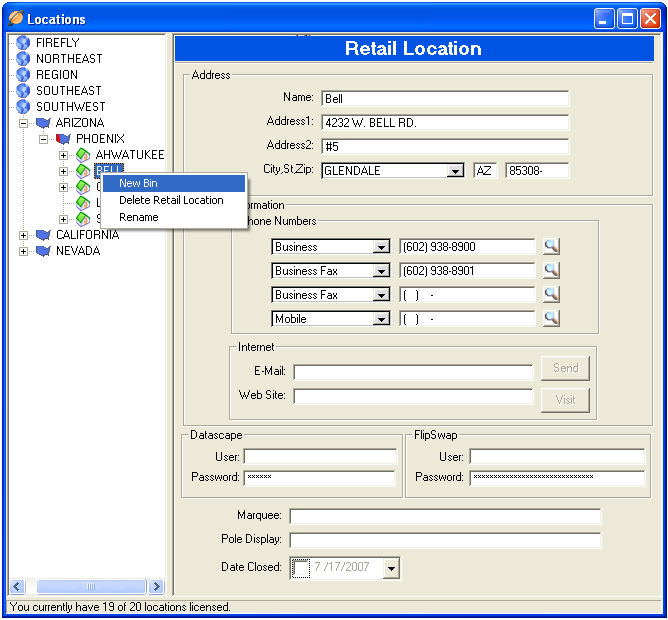
3. Enter TRADEIN for the New Bin name and press enter.
4. Repeat steps 2 and 3 for all locations where you will accept Flipswap trade-ins.
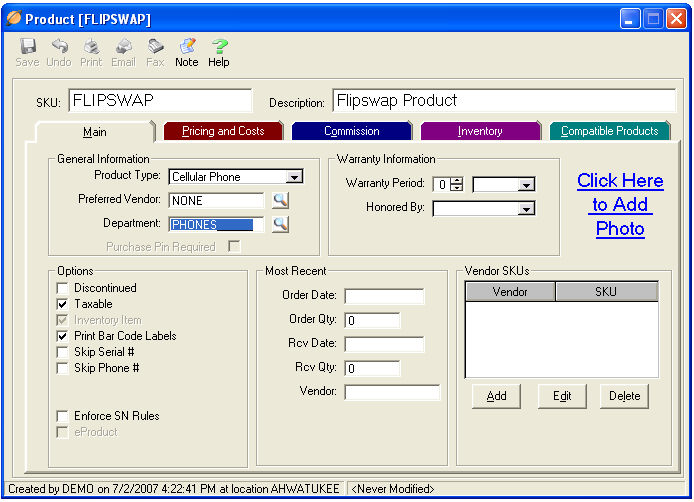
Products
5. Go to Master Files - Products and select New.
6. Enter a SKU and Description for accepting for your trade-in product. (We recommend using SKU: FLIPSWAP; Description: Flipswap Product)
7. Enter the Product Type and Department
8. Check Taxable, Print Bar Code Labels under Options and then click save.
9. Go to View - Preferences and select Invoices.
10. Set the Default Bin for trades to the TRADEIN bin established in step 3.
11. Set the Flipswap Tradein Product Code to the Flipswap product established in step 6.
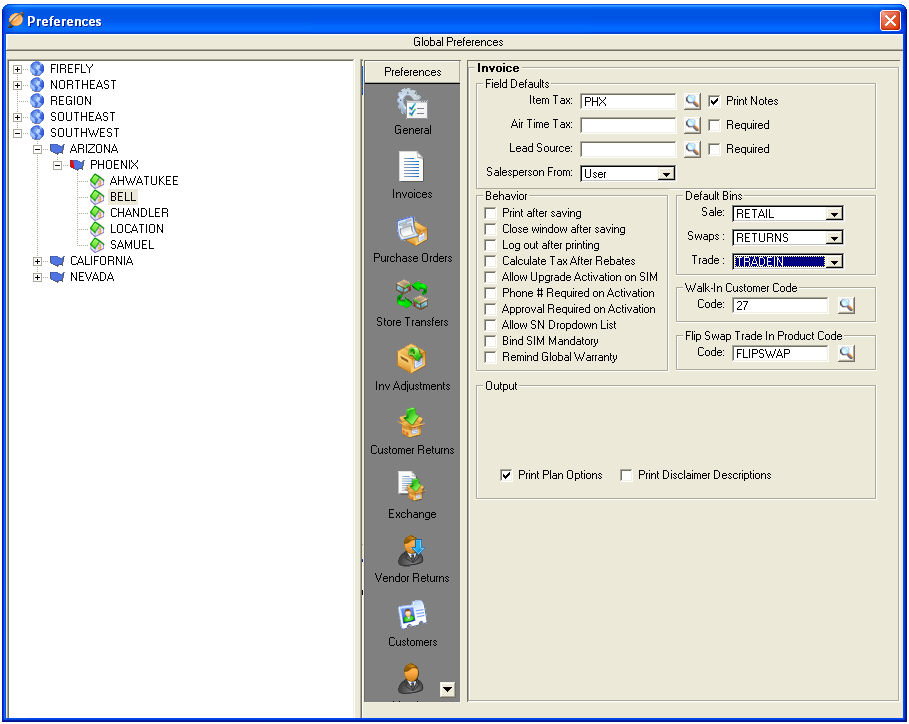
12. Close the Preferences window and select YES to save your changes.