QpaySetup
Preferences
1. Click on View and Preferences -> Global Preferences -> Third Party URL’s.
2. Fill out the QPAY URL (** This URL is provided to you by QPAY **)
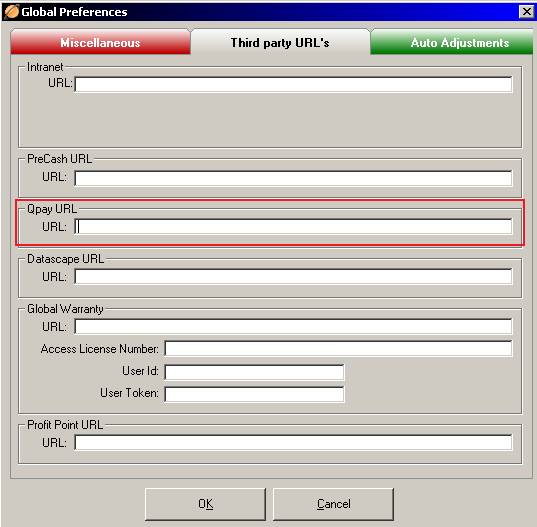
3. Click OK and close.
Vendors
1. Click on Master Files and Vendor.
2. Create a Vendor profile for QPAY.
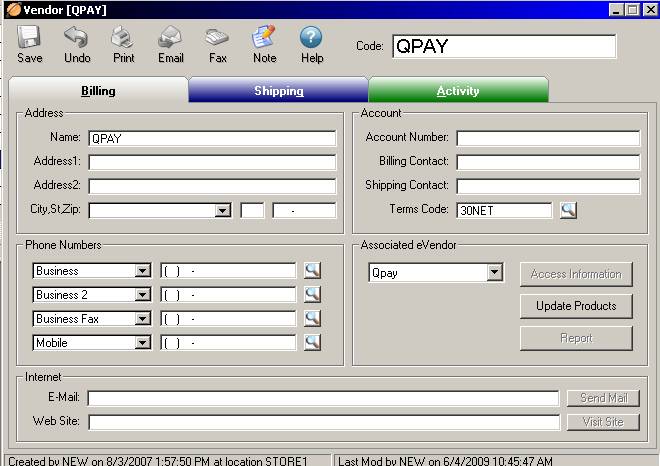
3. Click Associate eVendor drop-down menu and select QPAY.
4. Click Update Products.
5. Select a department for the QPAY Product then click Add next to the product.
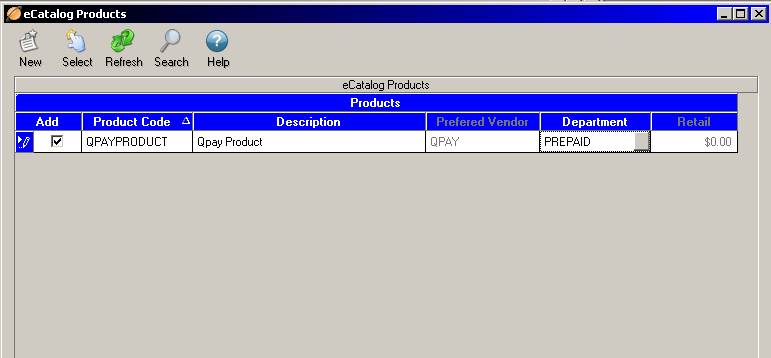
6. Click Select in the upper left hand corner of the screen, and the screen will close automatically.
7. Save the Vendor file and close.
Users
1. Click on Master Files - Users.
2. Enter the User ID and password for each user account that will access the QPAY system.
(** The user name and password for these fields will be provided by QPAY **)
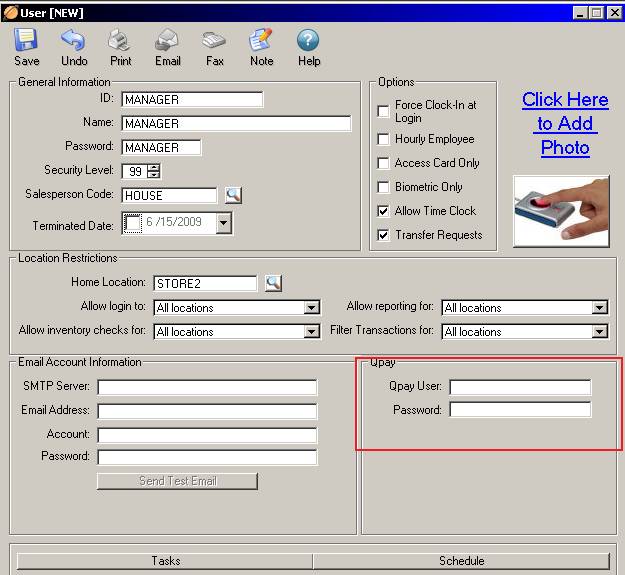
3. Save changes and close the window.