 Auto Provider Reconciliation
 Auto Provider Reconciliation
Wizard: Column Selections and Verification - Step 2
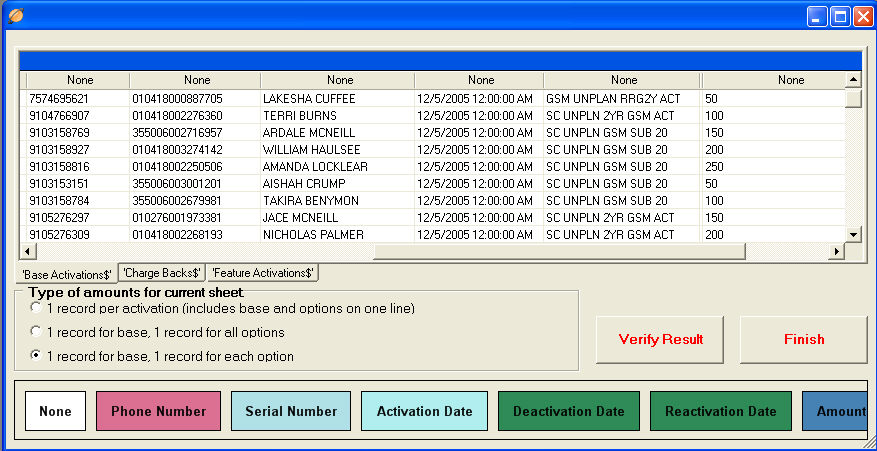
Once TeleTracker Online imports the commission worksheet(s), it will be displayed like the window seen above. If the file contained more than 1 worksheet, each worksheet will be listed as a TAB below the grid window. Use the scrollbar at the bottom of the grid window to view the additional columns imported.
Type of Amounts for Current Sheet
TeleTracker Online must know how to match the Service Provider Commission worksheet with your Activations within the database. Selecting the correct Type of Amounts will ensure proper reconciliation. This selection will depend on the specific configuration of your Service Provider commission worksheet(s). Click the following link for specific EXAMPLES.
 1 Record per Activation
(includes base and options on one line): The
Base Activation and any activated options are listed as a single line.
The commission
amount is a single amount including the base commission and any option
commissions. The
Auto Provider Reconciliation will take the different amounts associated
with a single phone number and add them together for comparison.
1 Record per Activation
(includes base and options on one line): The
Base Activation and any activated options are listed as a single line.
The commission
amount is a single amount including the base commission and any option
commissions. The
Auto Provider Reconciliation will take the different amounts associated
with a single phone number and add them together for comparison.
1 Record for Base,
1 Record for All Options: The
Base Activation is listed as it's own line item. All
Options are listed as one line item, yet independent from the Base Activation.
The Base
Activation commission amount is listed separate from the Options commission
amount.
1 Record for Base,
1 Record for Each Option: The
Base Activation is listed as it's own line item. All
activated Options are listed are listed as their own line item. Each
one will have an individual commission amount.

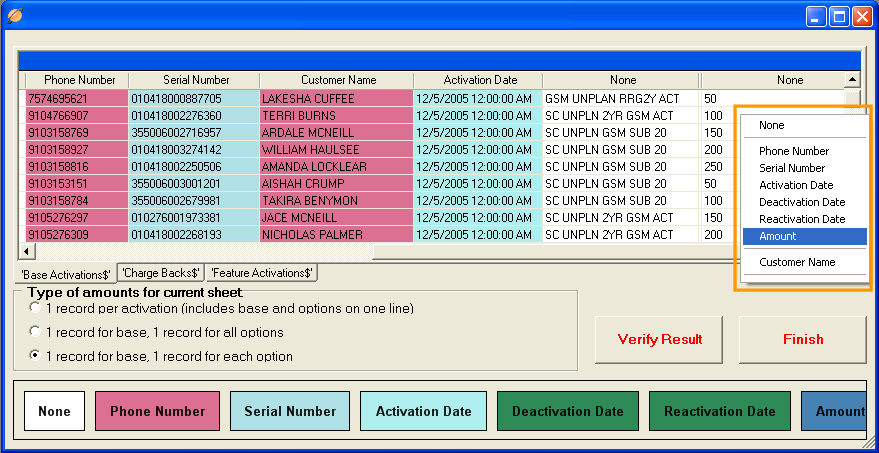
Take your mouse and RIGHT-CLICK on a column within the grid window. A list of column identifiers will be presented to you. Identify a column with the appropriate Column Identifier from the RIGHT-CLICK text menu. A RIGHT-CLICK menu can be seen above highlighted in orange. A MINIMUM of Amount and Phone Number must be selected in order to reconcile. For more detailed and descriptive reconciliation records, identify additional columns using the RIGHT-CLICK text menu.
As soon as you identify a column, a column color will be activated and the column header will be populated with the Column Identifier. Select the appropriate columns on each of the TABS imported from the commission worksheet.
The Column Identifiers shown in the right-click text menu directly reflect the selections in the Column Selections window, Column Selections and Verification - Step 1.
Click the  button to verify
the columns being compared for reconciliation.
button to verify
the columns being compared for reconciliation.
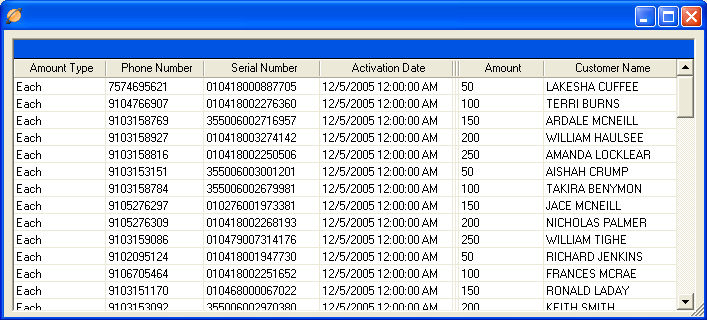
The results window will extract the identified columns and condense them into a single grid window. This window is for your reference, where you can see the columns and data that will be compared for reconciliation.
When verification is complete, close the window.
Click the  button.

Continue to Match with TeleTracker Online - Step 3

-- Wizard: Column Identifier and Import - Step 1 -- Wizard: Column Selections and Verification - Step 2 --
-- Match with TeleTracker Online - Step 3 -- Data Compare: MATCHED - Step 4 -- Data Compare: CELLULAR MATCHED - Step 5 --
-- Data Compare: NOT MATCHED - Step 6 -- Data Compare: RECONCILED - Step 7 -- View Reconciled and Save Transactions - Step 8 --